Page 1 of 3 123 LastLast
Results 1 to 10 of 30

Thread: 20 Gallon bubble bag run using BUD ( and hand mixer)

  1. #1
    Join Date
    Nov 2007
    Posts
    1,625

    Default 20 Gallon bubble bag run using BUD ( and hand mixer)

    Well this is my first bubblebag post on the new site, and im pretty exicted, i was gonna start off with the BUBBLENOWXL post, but i will show people that it is indeed still possible to produce full melt bubble, using a hand mixer. Now this batch was made last summer, so its a little old, as i do not use hand mixers any more since i've had the bubblenow's in stock> but i figured it would be nice to show the method using a hand mixer as many still use this method. I was lucky this day, as my buddy had just cropped out, and brought over almost two lbs of delicously well cured nugget. I have to admit i was pretty surprised he was into throwing all that bud in, as here in bc, it was easily worth 2900 plus per lb. But Razz isnt much into the money aspect of growing bud as much as he's into the BUBBLE ASPECT. so lets get this show started shall we...

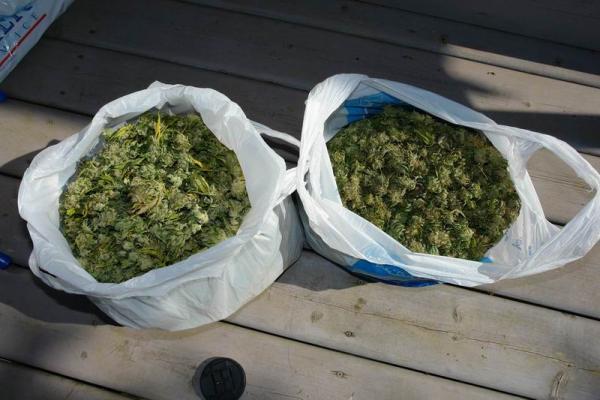
    So he brought over like i mentioned about two lbs of herb. Here is the shot of the bucket, with the herbs sitting out in front of the bucket.getting ready to work


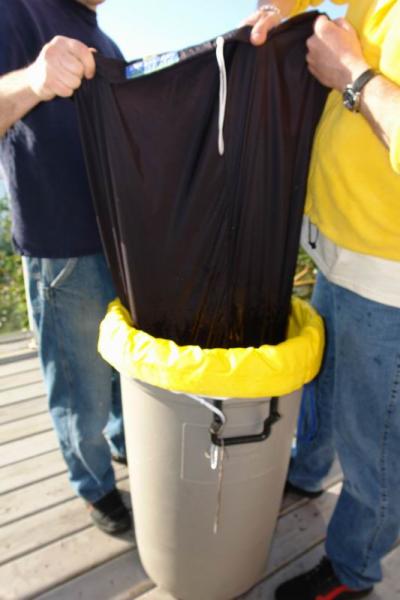
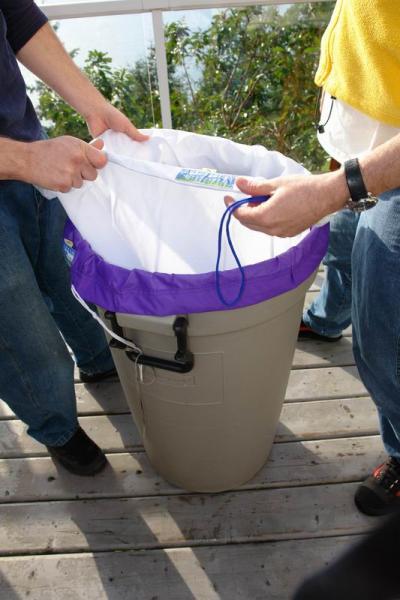
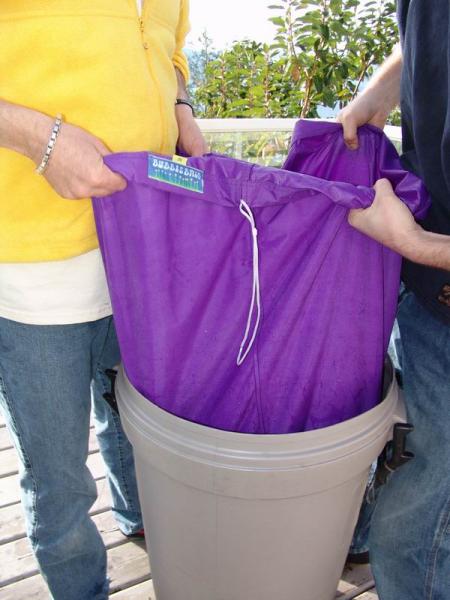
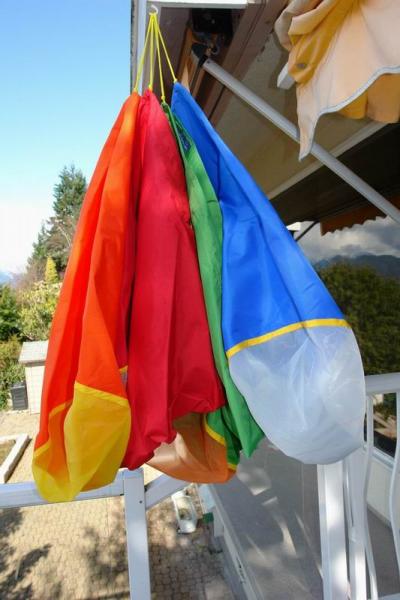
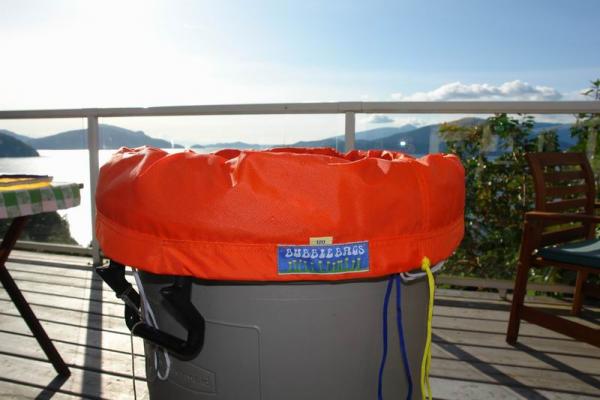
    the bags hanging anxiously awaiting to be put into the bucket and worked


    how the bud showed up


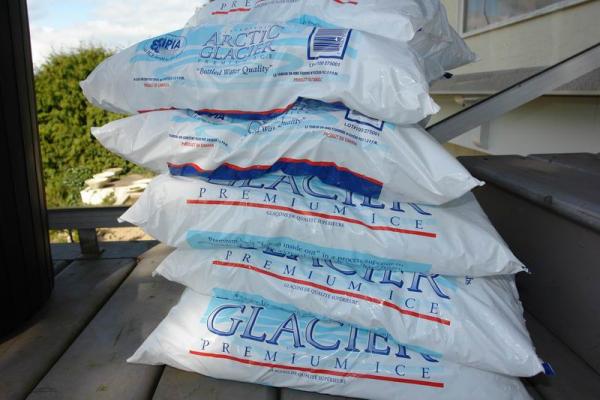
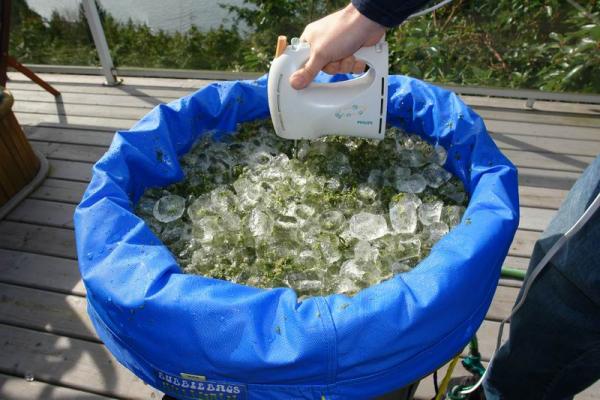
    a little ice for the project, i prefer to use homemade ice, but i didnt have it in stock this particular day so we bought store bought ice. its just not as good as good ole fashion home made stuff, for a few reasons, the ice is chipped, so it melts faster, and it often contains fluoride which also makes it melt faster. anyway it'll do in a pinch, you'll see


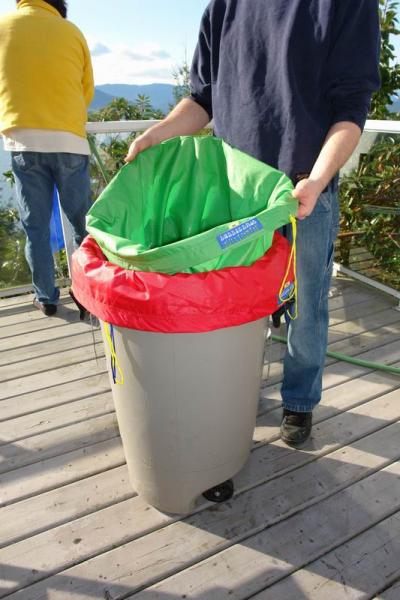
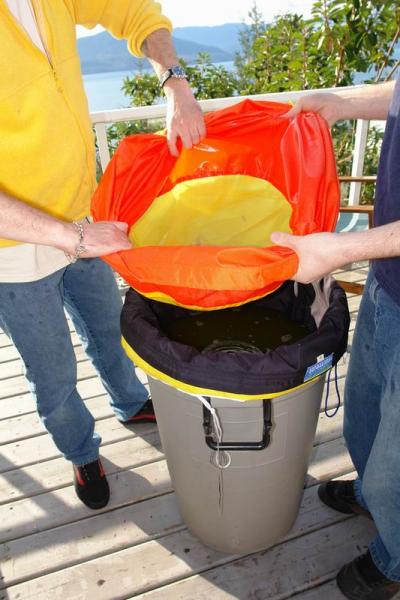
    So we start buy putting all our bags inside the bucket, for those of you that have never done this, the order is, 25u purple bag first, this is the smallest finest screen size, so it should go in first, so the hash collects in it LAST.
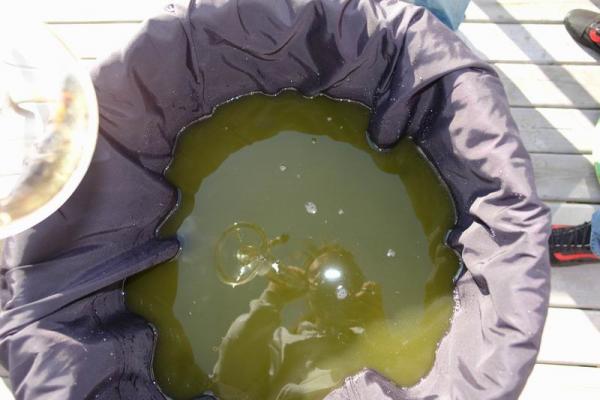
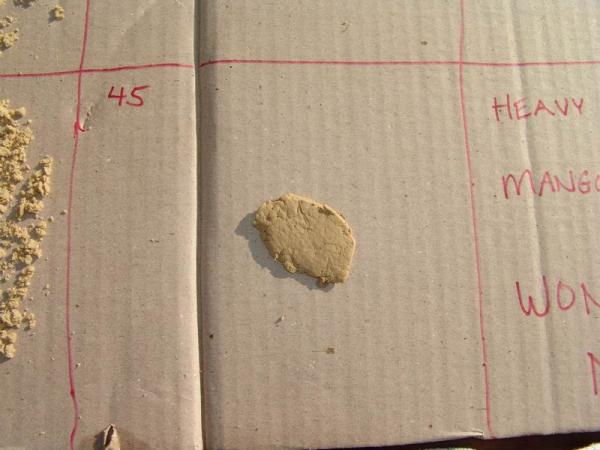
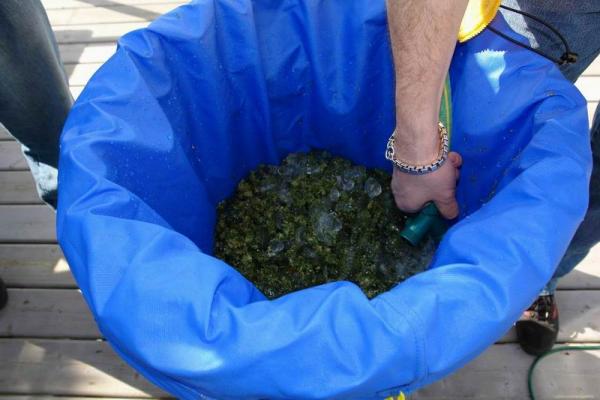
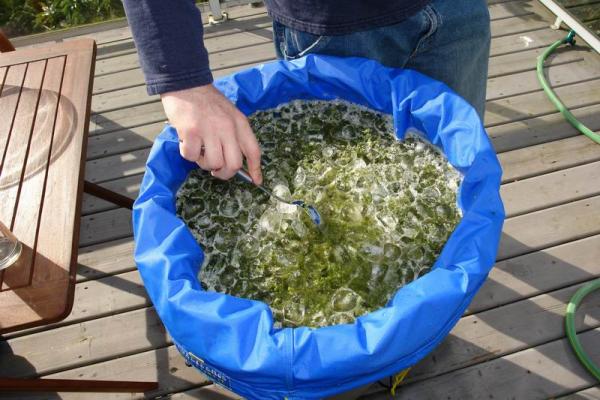
    Next we will put the 45uWHITE bag in, followed by the 73u yellow bag, followed by the 90u black bag, followed by the orange 120u bag, followed by the green 160u bag, and if your using a 190u REd bag, and finaly the work bag, 220 BLUE bag. ONce all the bags are tightly fit inside one another and you can fill the bucket up with cold water, ICE and the materials> Today we are using twenty gallons, so use LOTS of ice. The ice is key to this process. it not only freezes the wax membrane on the outside of the gland head, it also helps break it free from its plant body prison. ONce it breaks free it can sink down ( because of its density it is still affected by gravity even in water) and collect in the appropriate size screen.

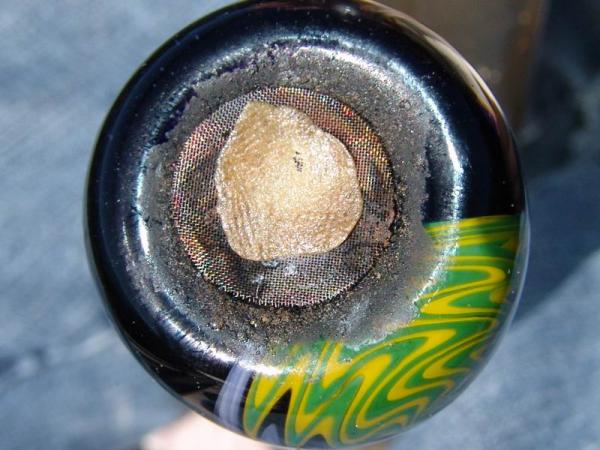
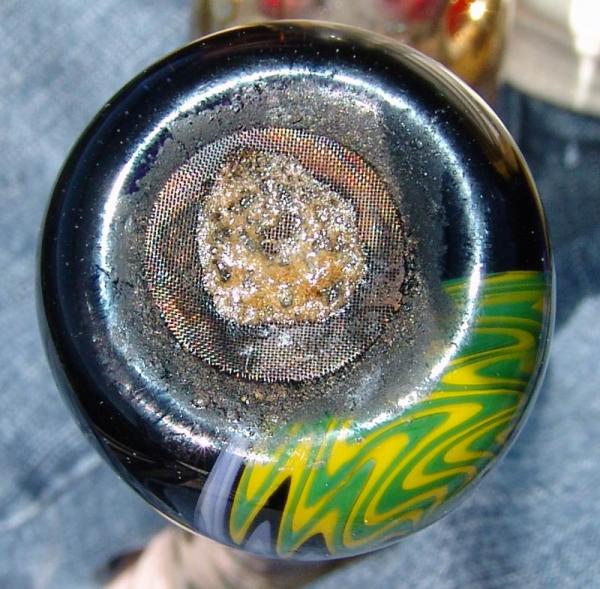
    We are using a small hand mixer for this batch and as you will see at the end, it hasnt affected our quality much at all. This is all about how well you mix> I keep the mixer medium and i realy move it all around the bucket> The material floats in the top 8 inches or so of the bucket, so its good to have plenty of ice, as its the ice that will smash back and forth hitting more ice, and more ice, until you are basicaly moving around the entire mixture. Do not attempt to place the mixer on a board or jerry rig it so its sitting in the middle of the bucket, you realy want to move that mixer all around the bucket. This insures you are getting a good mix on> Its more important to move it around than it is to have some HUGE drill mixing on full.


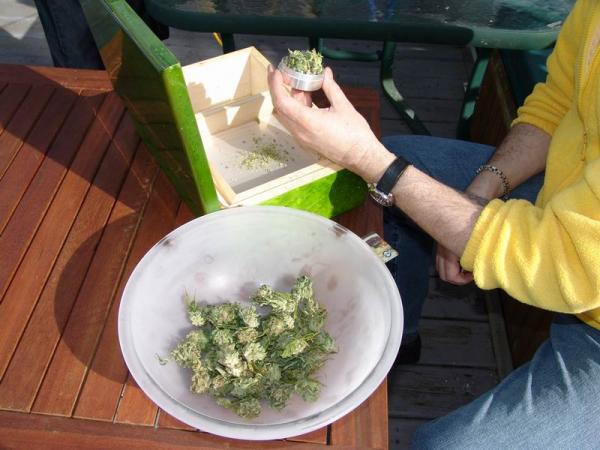
    while we were mixing, we played around a little with the bubblebox, figured a little dry sift would go down nicely while we were waiting for the full melt to drop.


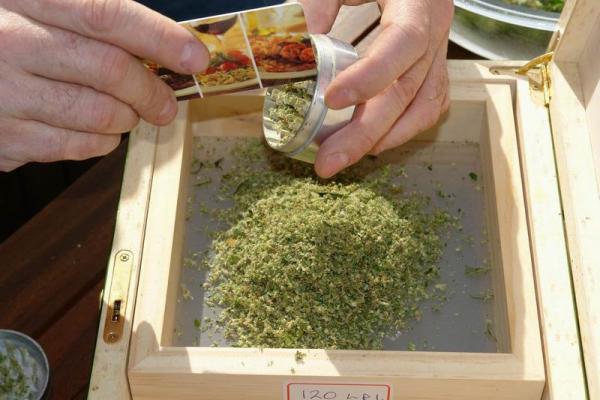
    throw a couple of buds on top of the top screen, break it up with a grinder...


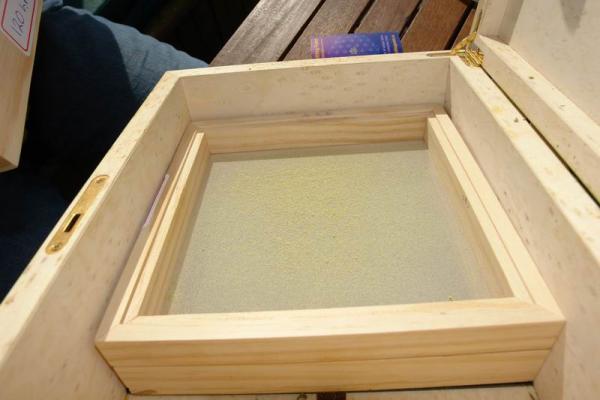
    and start collecting some yummy dust...


    we mixed for about 10 minutes on this batch, but while it sits for 20 to 30 settling, we move around the mixture every so often with a spoon, to keep any gland heads from getting trapped in the bud filled mixture


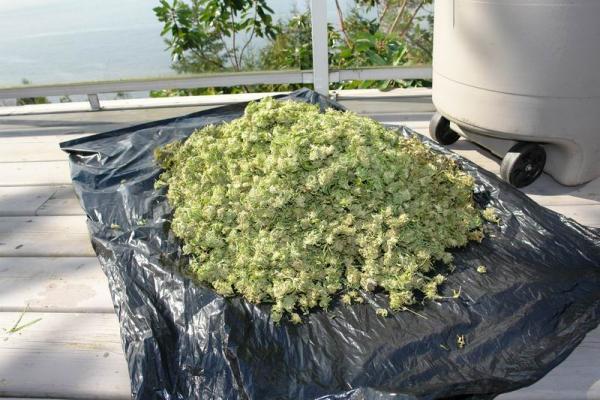
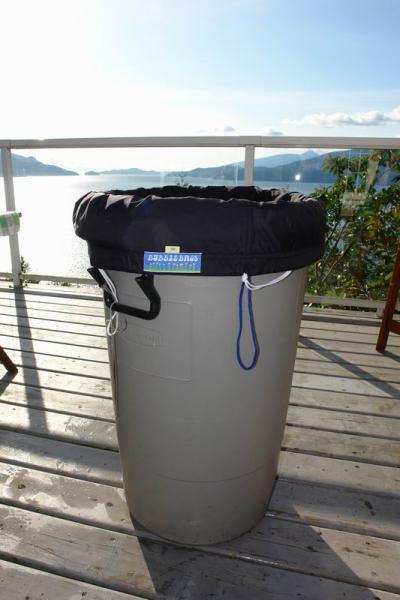
    Once we are done settling, we simly remove the blue bag from the bucket. DUmp the herbs out ( if you are keeping them for cooking you will want to dry them properly this can be a pain in the ass, so we just tossed the material off my deck lol)
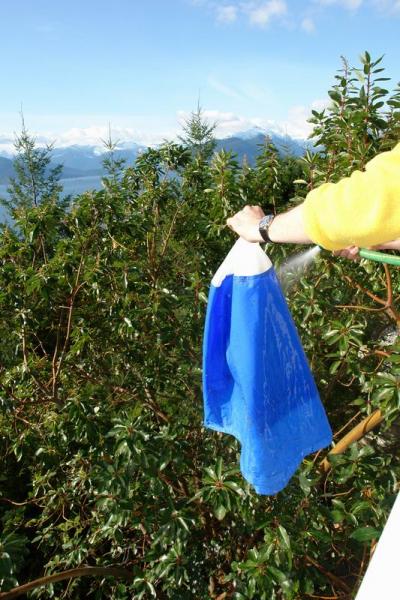
    We then IMMIDIATELY i cannot stress this enough guys, RINSE the bag out thorougly. This will insure your bags last as long as you will be needing them> they are a quality product, but will be ruined fairly easily if you do not follow this important step> They can mold much like a tent that is put away wet, if you dont clean them and dry them properly


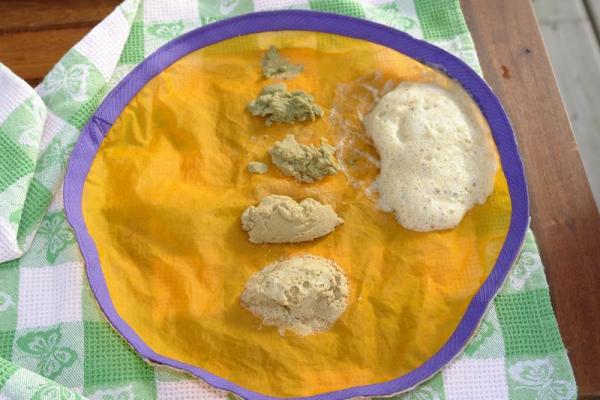
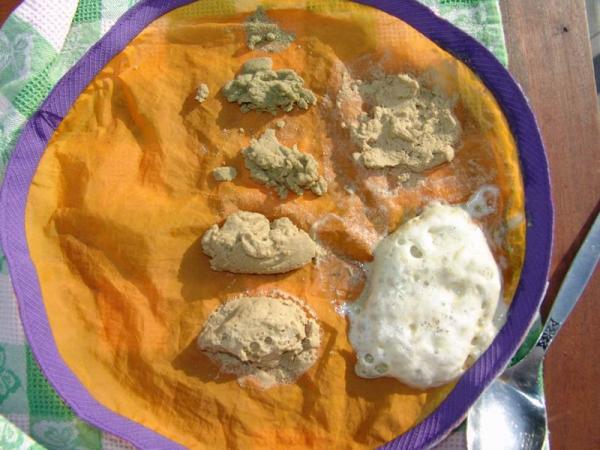
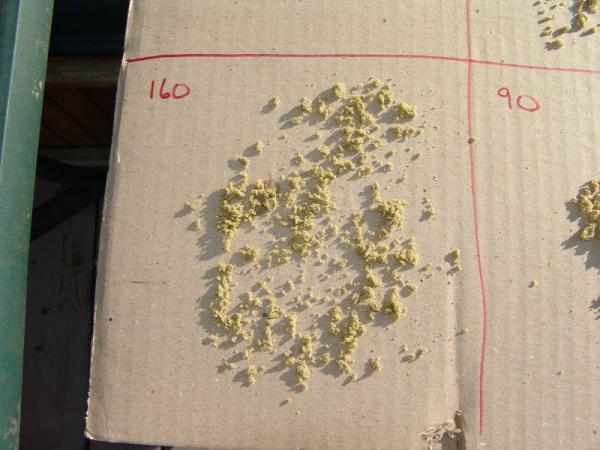
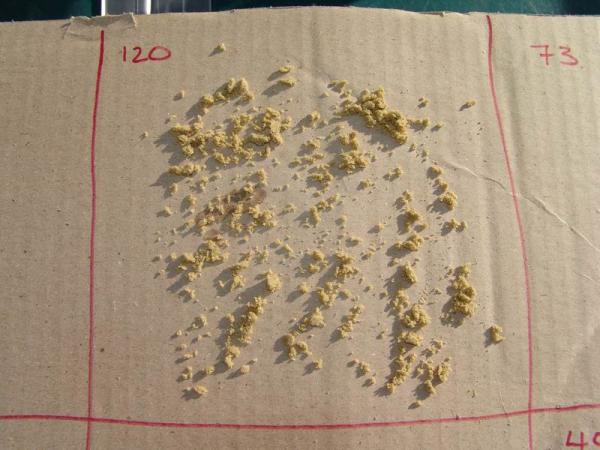
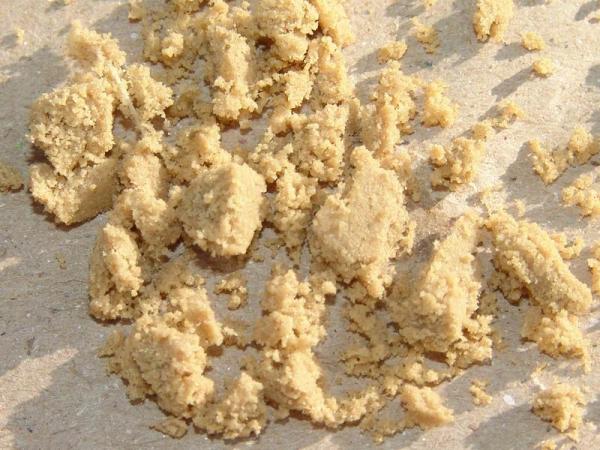
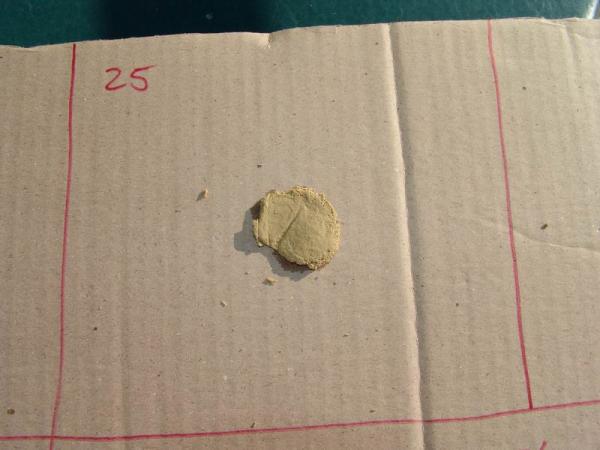
    Next we pull our contaminant bags i see in this batch i didnt put a 190u bag in so both catch bag grades will go into the 160 green bag. We pull this bag, and often i toss the bubble if it looks realy bad, or i wll collect it and place it on cardboard along with the other grades, even if just to give away to friends who cook with hash.


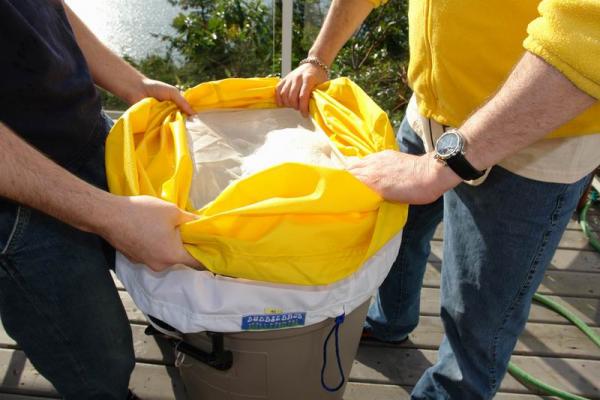
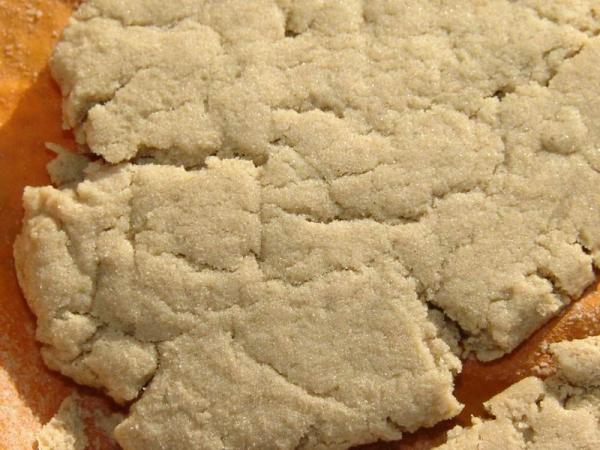
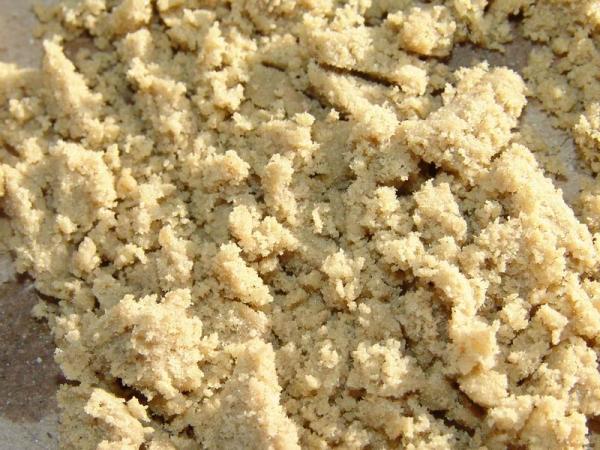
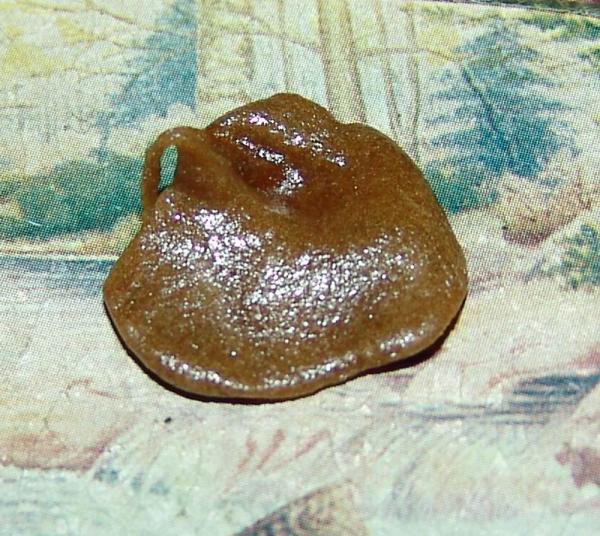
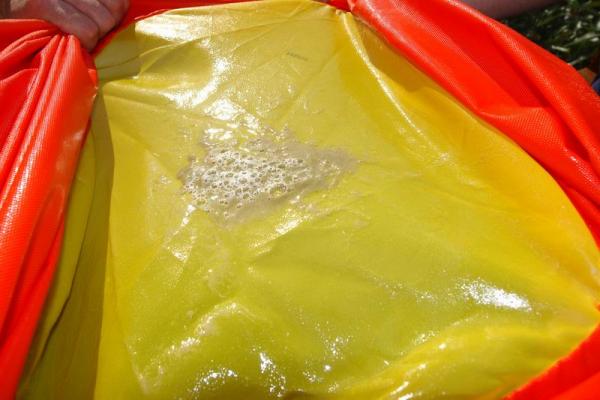
    Now we get to our first bag worth keeping. The 120u bag. the largest of the heads that are smokeable,


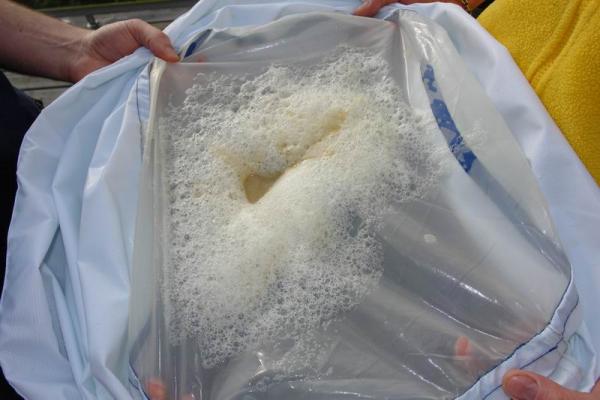
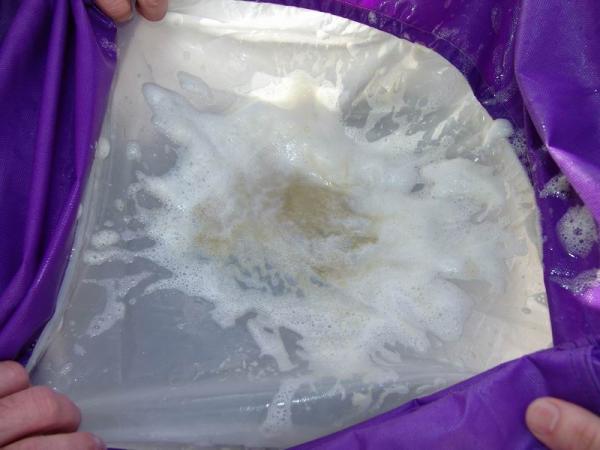
    slowly pull that bag up out of the bucket...


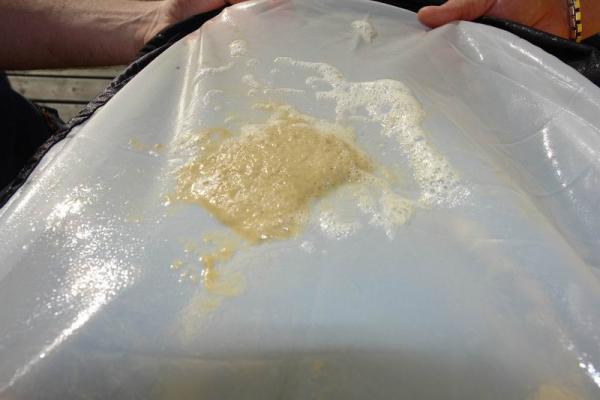
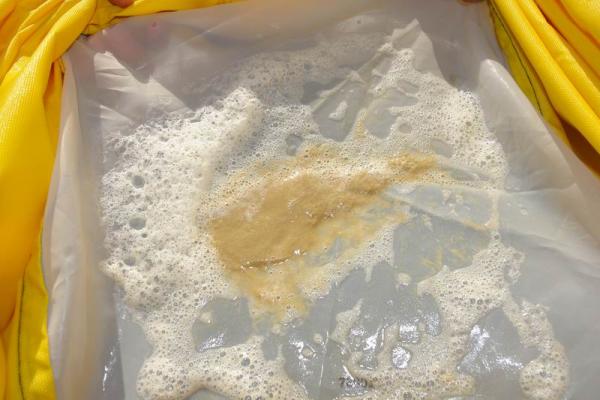
    See some lovely trichome glands sitting on the screen for collection.


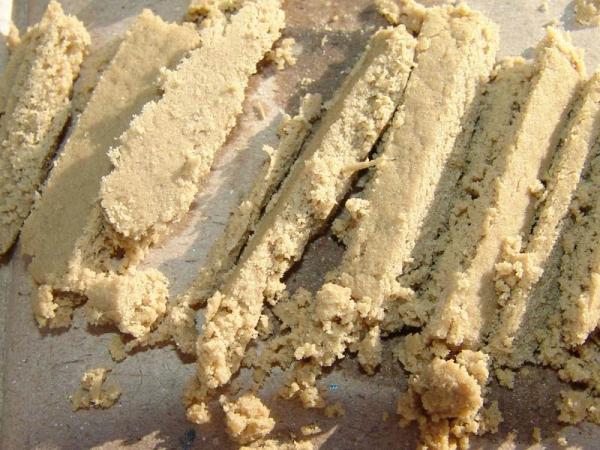
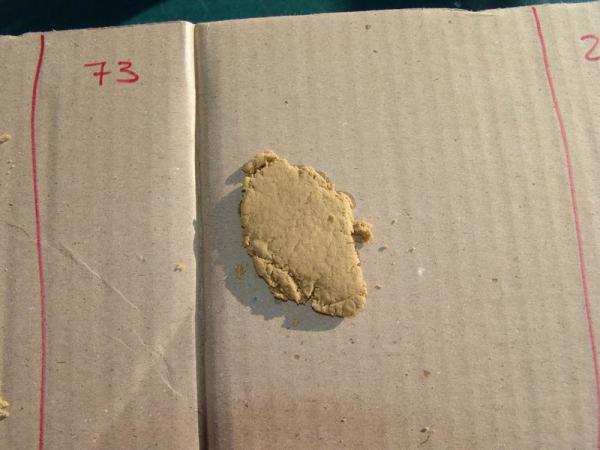
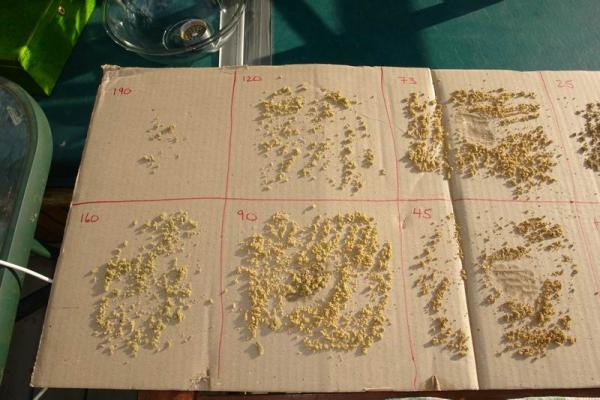
    I didnt get a photo of what i do next, so i will just explain> I scrape out the bubble with a spoon or a flat scraper. Gently placing it on top of the my pressing screen and pressing out any excess water. this will get it properly ready for laying on cardboard for the drying process. ( photos at the end of this thread)

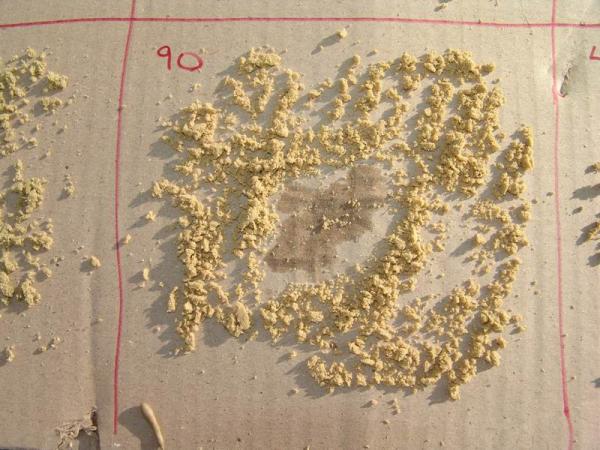
    Now we come to the black bag, our newest addition to the bubblabag family , the 90u.


    Because the 120 bag may be hard to clean you can flip it inside out and rinse the resin into the 90u bag. this will save valuable gland heads from being rinsed away. also once you are done rinsing the bag inside the bucket, use cold water and rinse the 120u out again so its ready for hanging and drying.

  2. #2
    Join Date
    Nov 2007
    Posts
    1,625

    Default


    pull the 90u bag up ..


    and lets see what we got....
    a nice little paddy indeed. full melt guaranteed...


    Next bag to pull is 73u bag, i didnt make this one gold for nothing> this is the goldengoodness.


    before the 90u bag this was always my favorite, now i find myself going back and forth between the 90u and 73u


    I will show all these paddies on the pressing screen as well as being chopped up onto cardboard once we have gone thru each bag,

    so now we have the 45u bag, to pull..


    this batch was done before i figured out adding drains to the bottom of the buckets. check my 40lbs of trim to 2lbs of bubble thread for easy step by step photos for adding drains to your buckets.

    so we have a couple of guys to pull the 45u as it can hold a lot of water in the bag, when the screen is filled with resin at the bottom.


    You will notice when making bubble that often the 45u and the 25u have a lot of froth once you pull the bag out and let it settle. Just be patient it will all break down and disappear before long. i sometimes will flip the bag inside out and place a towel on the bottom of the screen to absorb the froth/watery mixture from the hash, in order to make it easier to collect the bubble.


    So here we have our grades so far, placed on the pressing screen ( this is not your normal pressing screen, i was out at the time, so i cut the bottom off a 45u five gallon bag. it did the job lol


    now our heaviest and hernia maker bag, the 25u is ready to go> I would realy suggest putting a tap style drain in your bucket for this bag alone> the resin isnt always the highest quality, but well worth collecting, without the hernia lol


    as you can see the 25u likes to froth up as well mainly because of the jerk and tug method i talked about in my tokers bowl video, which you can view here, for more tips on making bubble

    http://www.pot-tv.net/archive/shows/...owse-3815.html


    Now lets get to some pictures of the bubble, placed on the pressing screen, i place a towel on the bottom and more screen on top and gently press the frothy paddies into nice little hash paddies. Dont press to hard, as the higher the quality your resin, the easier it will bind and make for more difficulties in breaing up over the cardboard.


    gently pressed paddies


    close up to show the purity and colour of the bubble


    here you can see the 160 broken up on cardboard, the cardboard is very important, please do not use a plate or a dish or realy anything but cardboard, it will help pull the water out of your hash in a way that no air drying could achieve.


    here we have some more 160 broken up over cardboard ready to start drying...


    here i have chopped up the 120u paddie into a powdery mixture. this is ready for cardboard


    here we have the 120 chopped fine and spread over the cardboard


    some 90u chopped getting ready for cardboard


    you can see how quickly the cardboard will absorb the water, look at the middle of this pile of 90u, spread out on the cardboard


    a paddy of 73 ready to chop...


    a paddy of 45u ready to chop...


    a paddy of 25u ready to chop


    here you can see the cardboard will all the grades starting to dry. until you get them all side by side like this, you can't see their subtle differnce's, but as they dry you will see them much more easily.


    I suggest leaving the bubble on the cardboard for at least 48 hours, moving it around every six hours or so, in order to give the cardboard new surface area of bubble to dry. The smaller you make the powder, the more efficiently it will dry. leaving it in chunks will keep moisture in your hash. You want a consistent powdery look. any tiny chunks that you can break open and see a different lighter colour inside, means Moisture is still present.

    here i have taken a small piece of 90u and hand pressed most of the water out of it, just for a taste. I wouldnt suggest you do this with the majority of your bubble, as its not the best idea to press wet hash, you rupture the gland heads, allowing the mositure to mix in and basicaly your hash will never dry properly, but for a quick little puff, it does the trick nicely especialy if you just want to test your melt factor...


    Throw a little in the roor with the custom marbleslinger bowl...


    ahhh we have MELTDOWN...


    the hash will get even meltier once the moisture is out of the bubble, so dry your bubble properly if you want it to smoke and burn properly.

    well thank you all for reading, and please if you have any questions feel free to ad them to this thread..

    Peace
    Bubble man

  3. #3
    Join Date
    Nov 2007
    Posts
    72

    Default

    Wow. Sure is awesome that there's still growers out there who don't just immedietally cash out, and instead opt for making a really amazing product. What did you yield from each bag? Did you only run it through once, or more than that?

    Awesome thread, can't wait for the next one.

  4. #4
    Join Date
    Nov 2007
    Posts
    1,625

    Default

    we got a few ounces total kaneda, but i dont remember weighing each seperate one, he left some for me and took some, and we gave some to another friend. so it was really all about just having a great product.

    The strains used where HEAVY DUTY FRUITY, FROM THCSEEDS
    MANGOLIAN INDICA FROM SAGAMARTHA SEEDS
    WONDERBERRY FROM SAGAMARTHA SEEDS


    ONCE AGAIN THANKS TO RAZZ , WITHOUT HIM IT WOULDNT HAVE HAPPENED.

  5. #5
    Join Date
    Nov 2007
    Location
    los angeles
    Posts
    615

    Talking

    oh, yeah, i remember that day......

  6. #6
    Join Date
    Nov 2007
    Posts
    41

    Default

    looks tastey bman!

  7. #7
    Join Date
    Nov 2007
    Location
    high up in a cheese hut
    Posts
    219

    Lightbulb

    Wonderful pics ...

    A tip if I may. Get a waterspray bottle fill with fresh ice cold water and spray the screen of the bag once it hash been pulled. This will get rid of any foam lickety splitt, which will make the gathering of the trichome mud much easier and the drying as well and will also send some of the smaller trichomes that may be stuck in the mud go through to there proper resting place.


    i also spray the water along the rim of the screeen and the bag wall this will dislodge any trichomes stuck there, and will allow you to centerize all of the trichomes in the middle for easier scooping and less need to scrape the bags with spoon etc.

    Last edited by trichomefarmer; 11-30-2007 at 08:00 AM.

  8. #8
    Join Date
    Nov 2007
    Location
    los angeles
    Posts
    615

    Default

    i remember being so psyched that whole week when i talked with bubbleman and we were preparing for this. i just knew the bubble was just gonna be fantastic. the gland heads on the heavy duty fruity were so fat i knew the 120 was gonna be tasty as well. and man, did it bubble up also! i went to the corner store, got 20 bags of ice and the older indian gentleman behind the register asked, "are you having a party?". i said "no i'm making hashish today", and we both had a good laugh, i guess more so for me.

  9. #9
    Join Date
    Mar 2008
    Posts
    41

    Default

    could anyone speak about which seed co is best? i have never smoked much "special" herbal, Just mexican stiva (i cant spell worth a damn) i have a dwc 4 chamber with full spectrum lights, one flower one veggie. I am a noob so easiest grow the best.

  10. #10
    Join Date
    Feb 2008
    Location
    In Hell [West Texas]
    Posts
    136

    Wink

    That is an absolute beauty of a run, thanks for sharing that.

    AWESOME!!!

    Paz y mas...
    PIPE HITTERS UNION - KNOW YOUR ROLE - JOIN THE UNION

Similar Threads

  1. 1 Gallon 4 bag upgrade question?
    By MaKeR in forum First Hash Runs
    Replies: 10
    Last Post: 02-16-2011, 01:32 AM
  2. 1 gallon 8 bag kit owner
    By Lord_sixx in forum Discussion
    Replies: 18
    Last Post: 03-20-2010, 02:45 AM
  3. =-Chem 4 vs. Hygrozyme Gallon=-
    By sog army in forum Indoor
    Replies: 5
    Last Post: 05-07-2008, 10:33 AM
  4. 32 gallon question???
    By Banshee in forum First Hash Runs
    Replies: 2
    Last Post: 03-09-2008, 01:44 AM
  5. 1 Gallon Buckets
    By boncharasi in forum Techniques
    Replies: 2
    Last Post: 02-15-2008, 04:49 PM

Posting Permissions

  • You may not post new threads
  • You may not post replies
  • You may not post attachments
  • You may not edit your posts
  •